|
There is nothing magic about free-energy and by “free-energy” I mean something which produces output energy without the need for using a fuel which you have to buy. Free energy devices have been around for a very long time now. I have stood beside a water mill and it’s power is scary as it could crush you in moments and never even notice. That mill is on a quietly flowing small river and it can operate at any time day or night without having to pay anything for the power which it uses. It will have cost quite a bit to build the mill in the first place, but after that, it produces major power year after year. Most free-energy devices are just like that as it costs to build them in the first place, but after that they run for free. This presentation is mainly for people who have never come across free-energy and know nothing about it. So, each chapter deals with just one device and tries to explain it clearly. We come now to the practical and useful aerials used by Jes Ascanius, a Danish developer, to whom thanks is due for sharing his design. Initially, he set up a system to charge his mobile phone battery overnight from an aerial. Let’s start with the very simple system and progress from that to more powerful arrangements. The initial circuit uses one strand of solid wire which rises vertically to a 700 mm diameter drum where there are some twenty turns. The arrangement is like this:  The aerial wire is several metres long, and in the prototype, was supported by (and insulated from) the eaves of a house. The aerial should be vertical or near vertical and a proper earth connection provided by driving a metal rod into the ground or connecting a wire to a metal plate and burying the plate in the ground as a good electrical connection is needed here. The earth connection used here is a 12 mm copper pipe 3 metres long, driven into the ground and the ground around it saturated with water:  The wire used to connect with the earthing rod is very important and should not be less than 8 swg copper wire, that is, 4 mm diameter and 13 sq. mm. cross-sectional area. With this free-energy device, this is an important detail as are the diodes used which are germanium 1N34 or 1N34a which are particularly suited to this application due to their very low voltage drop. For the 200 nF capacitors, ceramic disc types are recommended. The prototype build used two large scavenged capacitors and it looks like this: 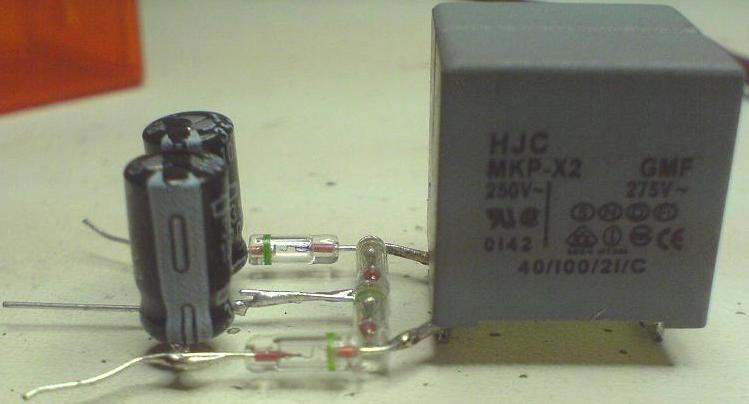 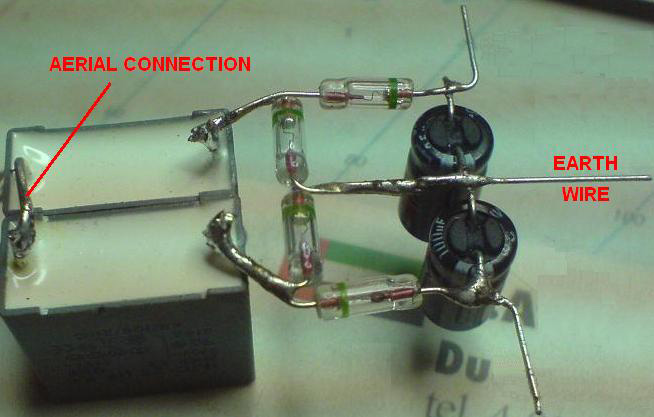 Now, consider this circuit as described, to be one modular building block which can lead to serious power being drawn from an aerial. I will represent the circuit shown above as a rectangle, showing the above circuit as:  While it is possible to use more than one module with the aerial to get more power, the Danish developer then switched to a more advanced arrangement by attaching a 600 x 800 x 2 mm aluminium plate inside the sloping roof of his house: 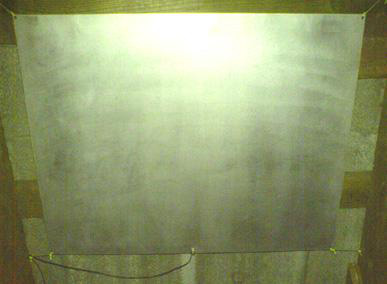 The plate being suspended using nylon cord to prevent it touching the roof or anything else: 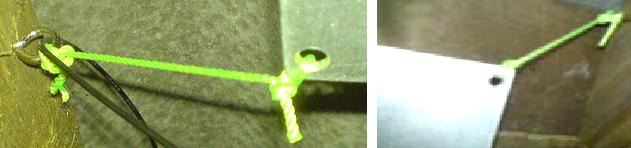 The plate is positioned between 3 and 3.5 metres (10 to 12 feet) above the ground and the attachment to the plate is also heavy-duty 8 swg cable: 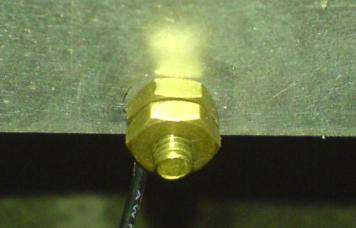 The cable is connected to the aluminium plate using a brass bolt and nuts which the builder thinks may be significant, quite apart from avoiding any galvanitic connection to the circuit. The cable is then run vertically downwards to the circuit. For this arrangement a second earthing point is also used. This is a galvanised iron pipe 3 metres long, driven vertically into the ground which is saturated with water. The second earth is 2 metres away from the first earth and there is no known significance in the use of an iron pipe as it was used because it was to hand at the time.. This arrangement provides serious power, enough to cause injury to, or kill a careless human. With two modules, it will light an LED very brightly, driving it to 2.6 volts. If the LED is removed, then the voltage climbs to about twenty volts and is easily sufficient to charge a 12V battery or battery bank although that takes time. With twenty modules a 12V battery can be charged over night. It is estimated that with two hundred modules, the power would be sufficient to power a household although that has not yet been done. It should be borne in mind that each module is easy and cheap to make, so arranging for a stack of them where additional modules can be added at a later date for more power, is an ideal arrangement. The circuit is like this:  This circuit looks completely mad as the aerial input to the circuit appears to be directly short-circuited by the first earth connection. In spite of this, the circuit works very well when connected this way. Additional modules can be added without any known limit. Increased power can be had by either raising the aluminium plate higher above the ground, to say, 10 metres (33 feet), or by adding one or more additional aerial plates. As you have a good aerial connected through to a very good earth, there has to be the possibility of the equipment being hit by lightning, and so it is recommended that a protective spark-gap is installed between the aerial and the earth, close to the circuit, so that if high-voltage is suddenly applied to the aerial, the spark gap will fire and shunt the excess power through to the earth. Alternatively, possibly a better solution is to install a standard lightning rod system a few metres away from the aerial and a metre or two higher up, so that it forms a more attractive point for a lightning strike. Further experimentation has shown that altering the connection point for the aerial has a significant effect on the results. If the connection is made at the mid point between the aerial plate and the earth connection, it produces a greater output:  With this arrangement a single module produces around 30 volts while the original method of connecting near the earth was giving about 26 volts with two modules. Jes Ascanius has carried out further experimentation and he states that diodes with response times under 30 milliseconds produce a greater output and he recommends the use of BYV27 diodes which have a 200-volt 25nS rating as he gets three times the output from them. He also recommends using them in Joule Thief circuits. Dragan Kljajic has been experimenting with this circuit and has started by building many of these modules on a printed circuit board like this:  Using two of these boards, Dragan is pulling 96 watts continuously from his aerial plate. He intends to extend this arrangement much further, but that is for a later date. Here is a forum where some builders of this system share comments. One comment is that there is an increased risk of a lightning strike where you have an earthed aerial, and so it is advisable not to place the aerial plate inside a house, but perhaps suspended between two trees. Also, using a car spark plug connected across the module set can protect against lightning strikes damaging the circuitry. As a result of queries, Jes stresses the following points: 1. The plate must be high off the ground. 2. The plate must be polished and insulated. 3. The wire must be single-strand solid wire. 4. There must not be any part of the wire above the circuit, which is not insulated. He further comments saying: you can use aluminium foil and cling film to make many collector plates 0.4 m x 5 m and connect them close together to feed the aerial wire. Remember, no uninsulated wire anywhere. Any queries should be asked on the forum shown above. A modification of this circuit of Jes Ascanius’ by a developer who prefers to remain anonymous, doubles the output of each module by adding a mirror image of the circuit like this:  As can be seen, the addition is of four diodes and two capacitors. Presumably, using BYV27 diodes rather that 1N34 diodes would create a further enhanced output. Patrick Kelly http://www.free-energy-info.co.uk http://www.free-energy-info.com |